Tips on Making a Charcuterie Board
Hey y’all! Hope your day is as fabulous as you are! Today is my birthday and I am now 45! YIKES! So, what better way to spend my birthday than to share some tips on making a charcuterie board. Have you ever made one before? To me, charcuterie boards are perfect for any occasion or gathering. They offer such a huge variety of foods so everyone will be pleased.

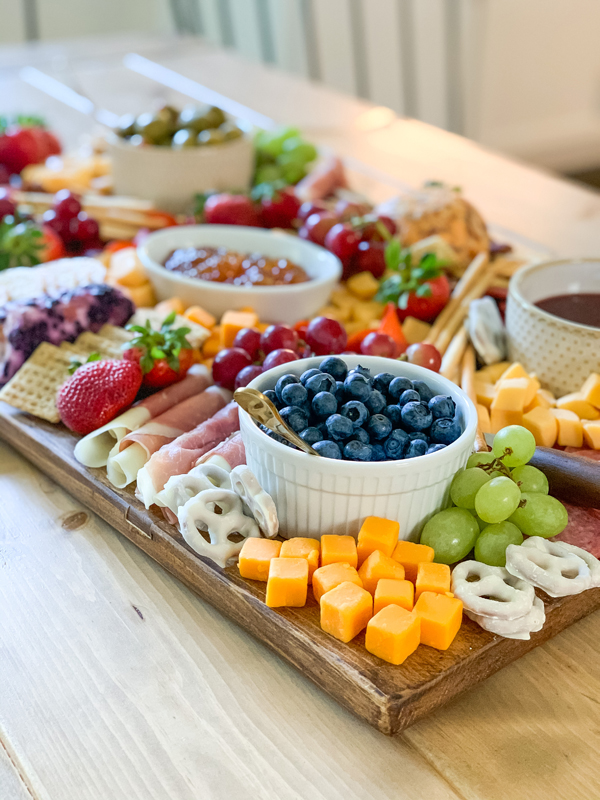
When I am building a charcuterie board, I like to use these 9 simple steps. It does my brain good to not get overwhelmed looking at everything all at once so I just follow each step.
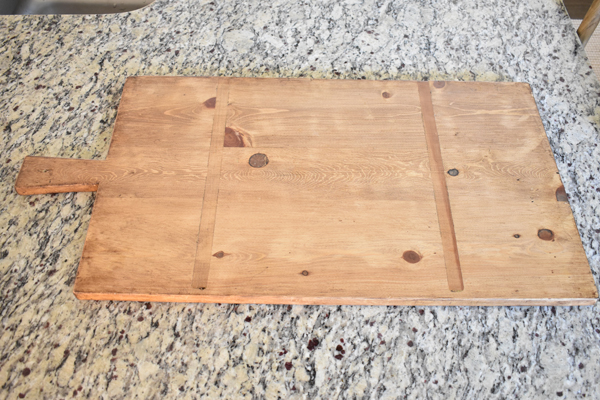
- Choose your base-selecting the right base is crucial. I prefer to use a large cutting board but some other good options are wood slices, a pizza peel, slate board or serving tray. You can go with whatever size you feel is appropriate for the size of the gathering. For 6-8 people, I would do a board around 12″. This board is about 27×16″. Here is a similar one from World Market.
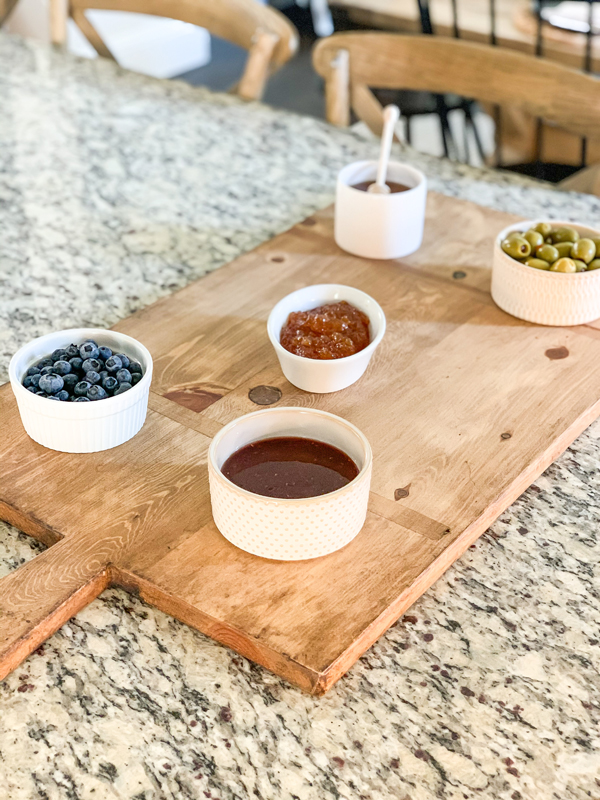
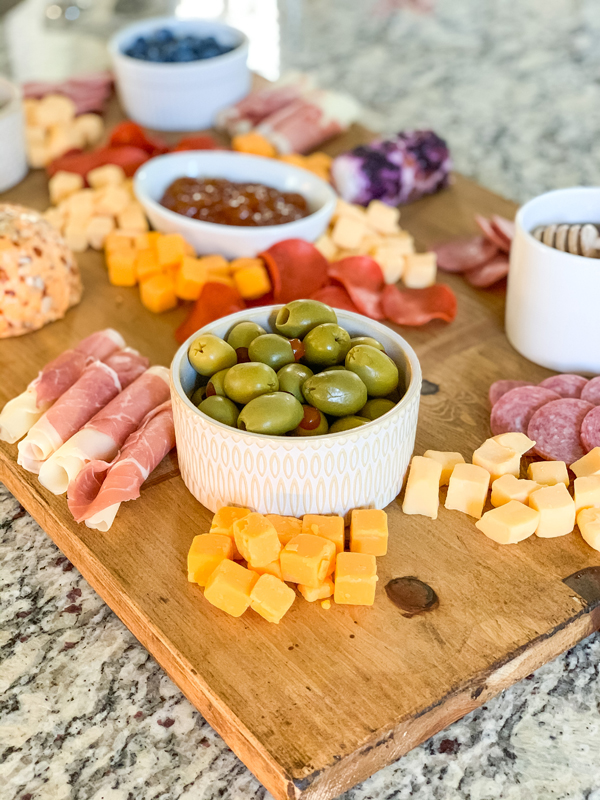
- Start with small bowls-before placing anything else on the board, start placing the bowls that will house jams, jellies sand dips. Here are some of the bowls I used.

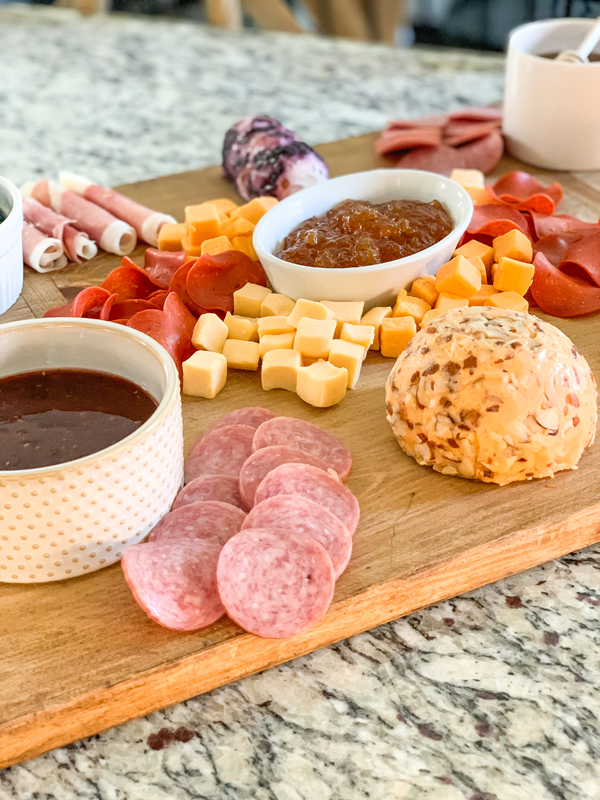
- Add jams or preserves-I am a huge fan of Fischer and Weiser Raspberry Chipotle sauce. Another good one is Klein Bros Peach Jam. I also like to add Oak Hill Farms honey. You can also add mustard, chutney or sun dried tomatoes.
- Add a variety of meats and cheeses– a good rule of thumb is to pick from 2-4 different meats and cheeses. Salami, prosciutto and pepperoni are all great choices. It is good to select some mild and some spicy meats. When deciding on an amount, a general thought is to get 2-5 ounces of meat per person. As far as cheeses, I love cheddar, goat cheese, and gouda. Offer a variety of soft and hard cheeses. A great soft cheese is Brie. A terrific semi-soft cheese is blue cheese. A great firm cheese is Aged Gouda. World Market always has a great selection of meats and cheese spreads. Whole foods is another great place for a variety of cheeses and meats.
- Vary your types of crackers and carbs-I like to use breadsticks, Triscuits, Nut-thins and Ritz crackers. Table crackers are also a big hit! You can also use pita bread, pita chips, focaccia or even baguettes.
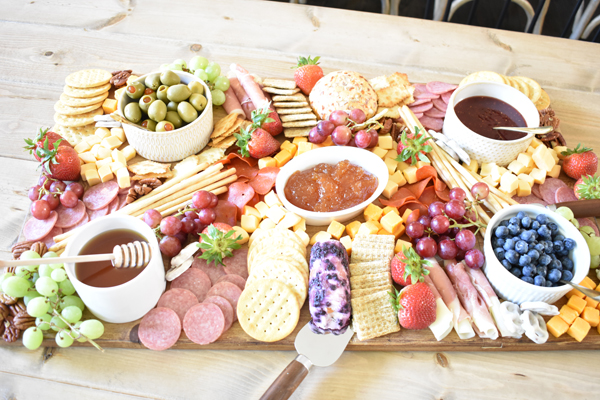
- Add fruit to add color and sweetness-choose fruits that are in season and that will make your board pop with color. Strawberries, red and green grapes and apples. You will use the fruits to fill in any gaps you have after placing your meats, cheeses and crackers. Feel free to use fresh and dried fruits.
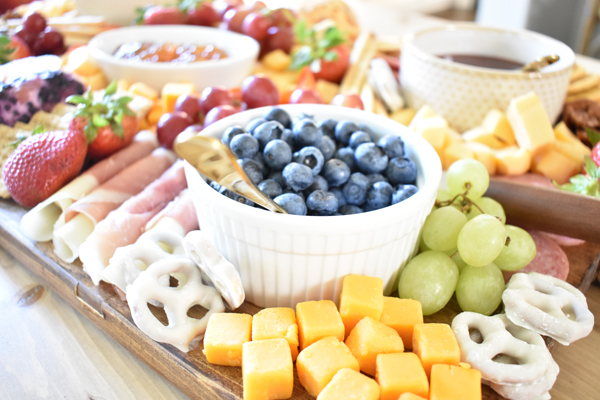
- Vary textures-it is always good to use a variety of textures. Smooth and shiny items like grapes, rough-edged items like Triscuits and wet items such as jams and jellies. Odd-shaped items such as pecans are a great choice as well.
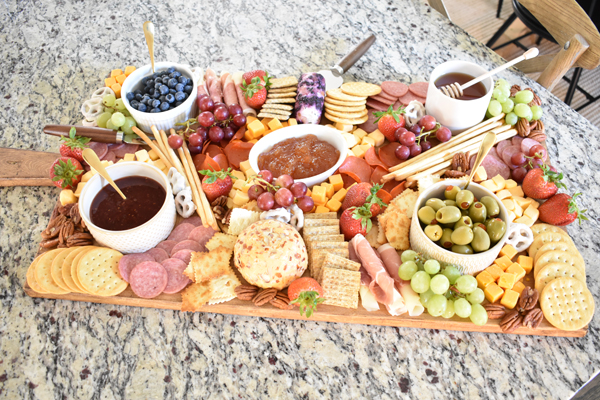
- Distribute colors evenly-when placing your fruits on the tray, make sure you space them out so the color stays balanced on the tray.
- Add something salty-it pairs well with the meats and cheeses. Do this by adding olives like cerignola or kalamata and baby pickles or pickled peppers.
I use these tips on making a charcuterie board every single time! The great thing about making a charcuterie board is that you really can’t go wrong. You can even change it up and do ones that are full of sweets(my daughter would love that), or even a main dinner. My friend Bethany at Crisp Collective IG did a BBQ board for Father’s Day that was so fun! You can really do anything and you are only limited by your own imagination! So, my advice to you is to just get started. Once you do your first one, you will feel like a pro. Be sure and check out lots of other fun food items on the blog. Be blessed friends!


This is beautiful… and such a great step-by-step to follow. Thank you!
Thank you so much! It was so fun to make!