The Quickest DIY $3 Table Charger Plates
It has been a while since I did a DIY project. Sorry about that friends. Life just gets away from me and then I realized I hadn’t brought you a fun and easy DIY project in a bit. Today, I wanted to share the quickest DIY $3 table charger plates. Oh my heck, this is truly crazy easy!! If I can do it, ANYONE can do it!
Can I get an AMEN?
Seriously, I am not the craftiest person in the world and I did it!
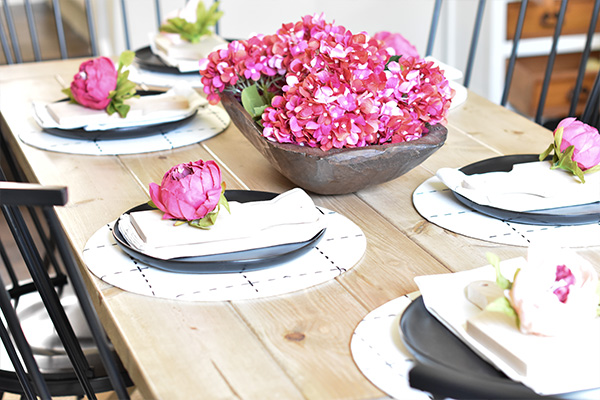
I had a dilemma y’all! I wanted to change up my dining table but I didn’t want to go spend $50 on chargers that I didn’t even really like. So, I thought, why not get some fabric and make my own? I went to Joann’s and looked for something that was round and would work to put the fabric around. I went down the cake aisle and saw cake boards and knew that would work perfectly. Now, I was at a loss for what size boards I needed so, I had to give the Hubs a call and get him to measure the ones I had on the table currently. He said those were 15″ so I went for the 14″ cake boards. I felt like 16″ would be too big!
Ok are y’all ready for this?
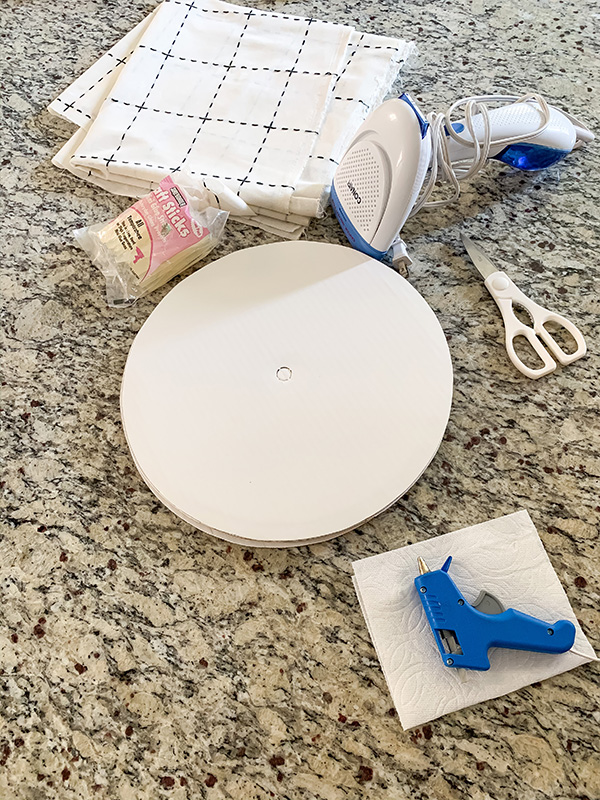
Let’s start with the materials you need:
Glue gun and glue sticks
Iron or steamer (this is the one I use and I swear by it). It is so easy and it actually works!
Fabric of your choice ( I went with a white fabric that had a beautiful black threading going through it. I got a yard and a half of fabric since I was doing 6 chargers).
Round cake boards in 14″ size (I bought mine at Joann’s Fabrics).
Scissors ( I just used my Cuisinart ones and they worked perfectly).
Now that you have all of your supplies, you and I are ready to create the quickest DIY $3 table charger plates.
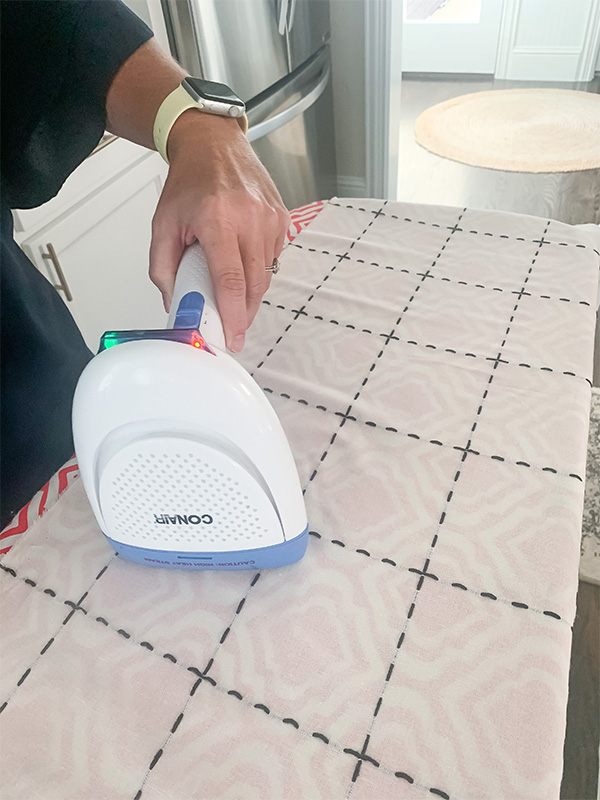
The first thing I did was iron or steam the wrinkles out of the fabric. The fabric wasn’t too bad but I didn’t want there to be any wrinkles in the chargers.
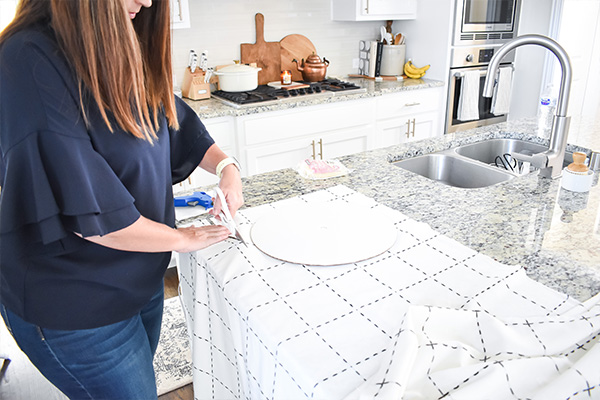
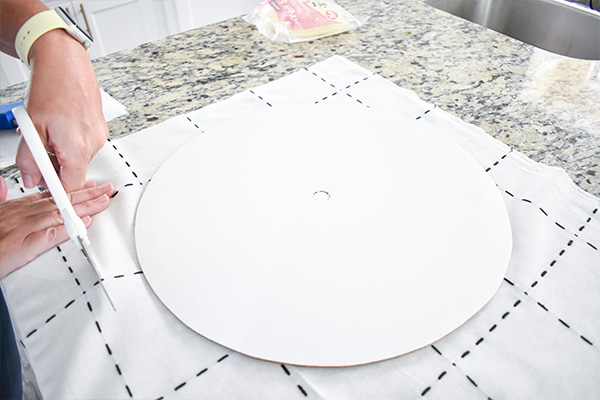
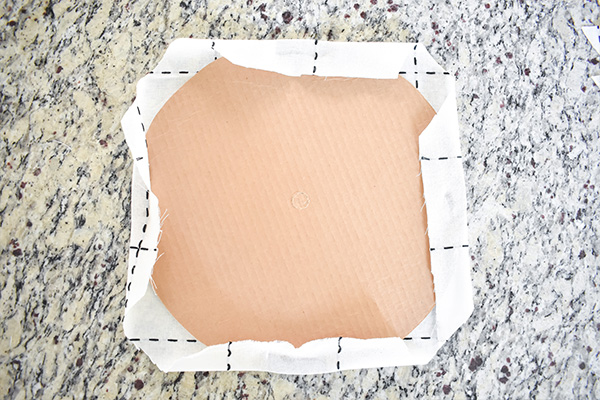
Once I had all of the fabric ironed, I placed the cake boards on the fabric and cut out a square. You really don’t need a bunch of overhang, just enough to glue the fabric to the back side (maybe an inch or so).
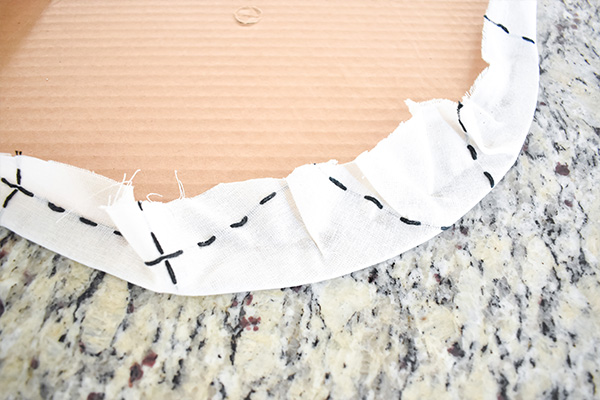
I started by gluing 4 spots around the circle just to make it sturdy. Once I had the 4 spots glued, I just went around the circle and glued inch by inch and stuck the fabric to the back of the board. Make sure you pull the fabric tight so there are no imperfections once you turn it over.
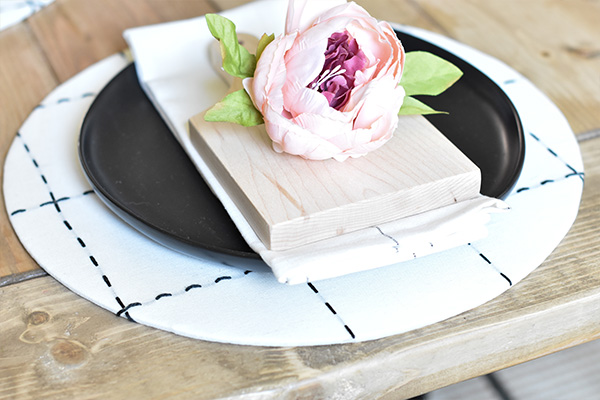
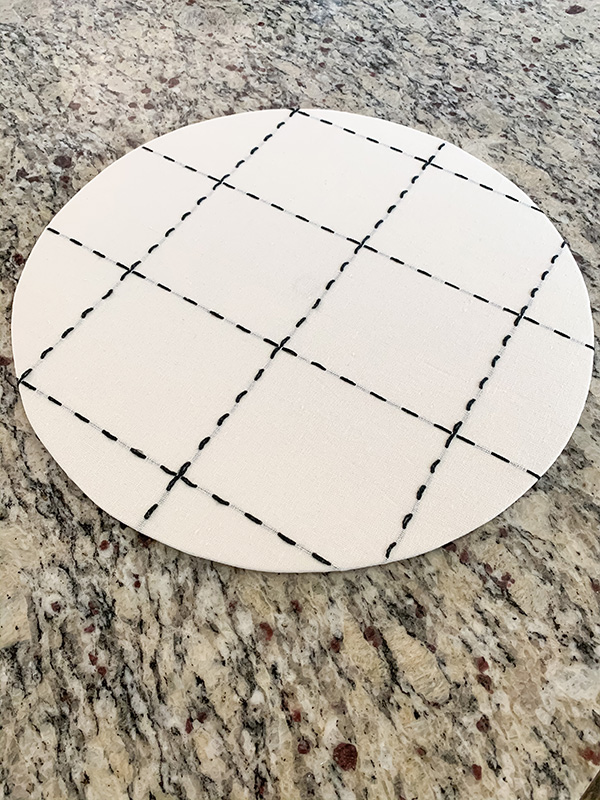
Isn’t this fabric adorable with the black stitching through it?
Alright, y’all are not even going to believe me when I tell you we are done.
Crazy isn’t it?
Are those not the quickest DIY $3 table charger plates? All you have to do is repeat the process for however many you need. I made 6 so I got a yard and a half of fabric and still had some left over.
What I love most about these chargers is that they will transition into the next season with me. Can you say HELLO FALL???
Speaking of Fall, do you know yet what your color for the Fall season is going to be? I think I am going with a rusty blush color. I hope you like it.
Oh, and I’ll let you in on a little secret……I will be doing a Fall blog hop with some of my dearest friends. Keep our eyes peeled. And to make sure you don’t miss out, be sure to subscribe to my blog and you will be the first to know.
Click here to subscribe.
Don’t you feel special? You should, because you are!!
If you would like to check out some of my other DIYs feel free right here. I have a DIY stencil wall, DIY drop cloth curtains, and so much more!
Let me know what you think about these chargers. I cannot wait to see the ones you create! Make sure and tag me on your social media @oursignatureswag on IG, Facebook: oursignatureswag, Pinterest: Our Signature Swag.
I also wanted to share some other fun tablescape DIYs around the bloggersphere. Apartment Therapy has a great idea for your table decor here. Luci’s Morsels has some table decor ideas here.
Have fun today and be blessed friends!


Love those good choice