DIY Aging Terra Cotta Pots
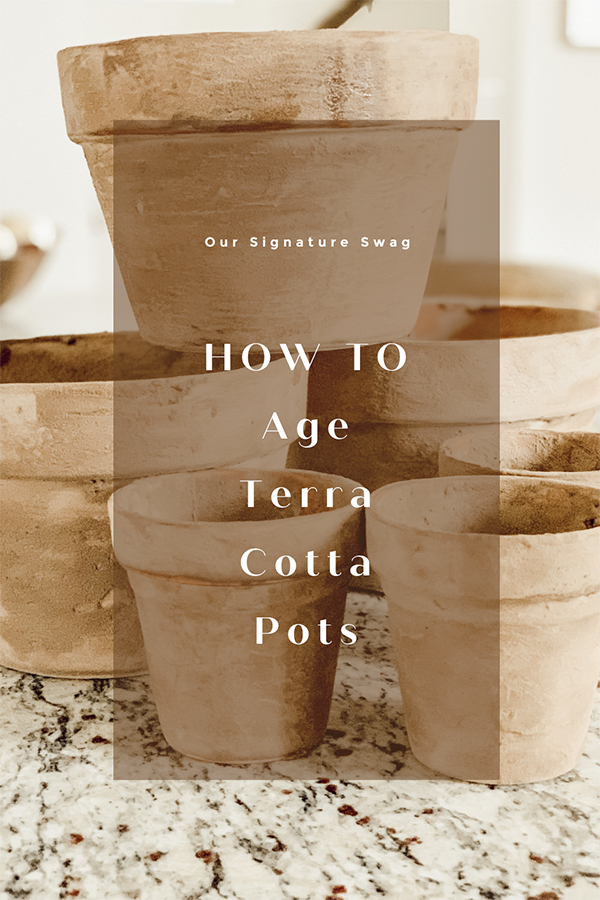
Well hello there sweet friends! As promised, I wanted to share a fun DIY with you. Remember yesterday on my IG stories I told you I would show you how to age terra cotta pots? Well, I am a woman of my word so here you go… DIY aging terra cotta pots for the win!
There are so many ways you can create an aged look on your new terra cotta pots. I wanted to show you the one I use because it is super easy and creates a huge impact!
This method of aging terra cotta pots uses garden lime. You can get it here through the Amazon link or you can get it at Home Depot or any garden center.
Let me just tell you something, terra cotta pots are HARD to find right now. I went to 3 Home Depots, 2 Lowe’s and 2 Walmarts. Crazy town right? I did not get the memo that there is a terra cotta pot shortage. Lowe’s ended up being my jackpot place, thank goodness. It’s really hard to show a DIY project without the actual supplies.
Who knew?
The first thing you will want to do is get all of your supplies together. You will need:
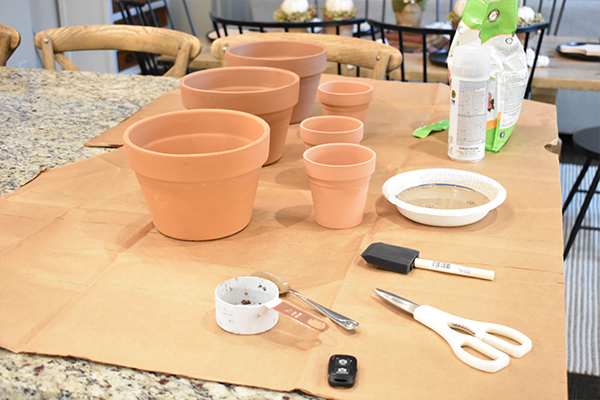
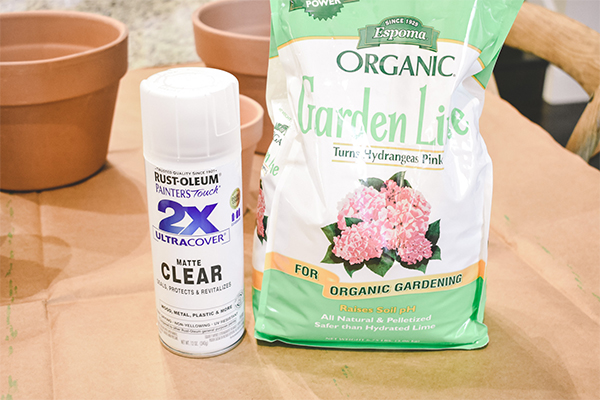
Alright, let’s start with mixing the Garden Lime. I used a cup of garden lime and 3/4 cup of water. The garden lime will thicken as time goes on so you may need to add a little extra water as you go along.
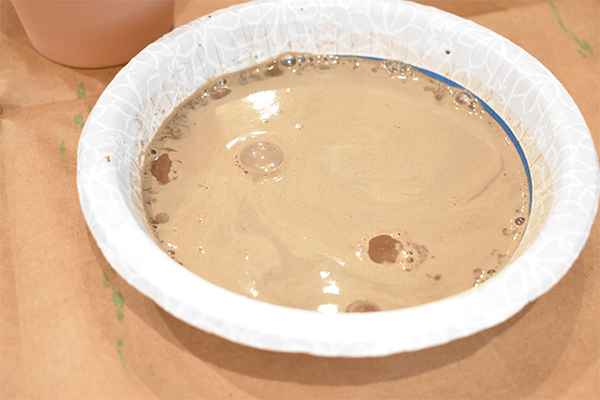
Once you have that mixed, you are going to just simply use a foam paintbrush and paint the mixture onto the pots. The thicker the better in my opinion. The chunky areas give it so much character.
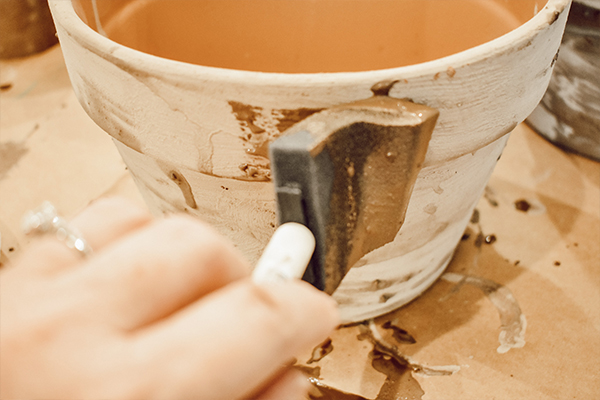
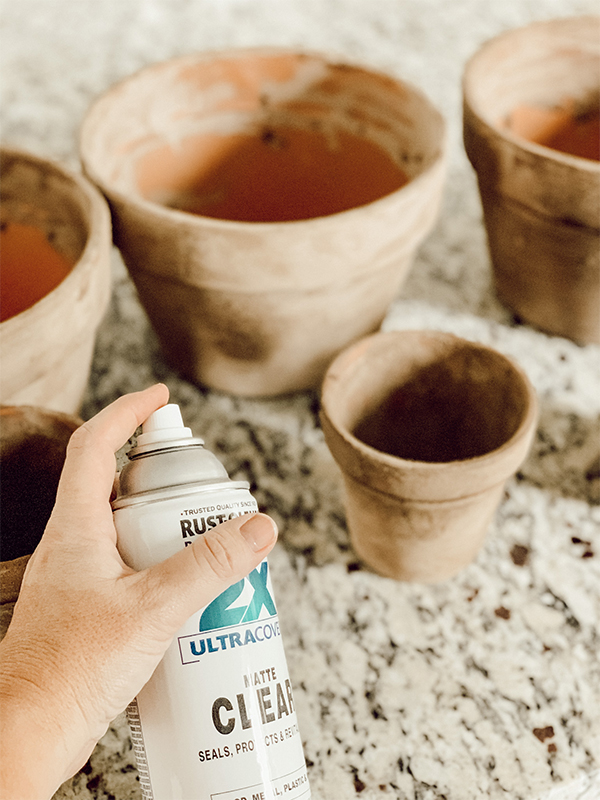
Allow the garden lime to dry completely and then, using 120 grit sandpaper, sand the pots. You can choose how much you sand it. If you sand it a lot, more terra cotta will show through. Be aware that when you spray the sealer on, it will also take some of the lime away. Just keep that in mind as you sand.

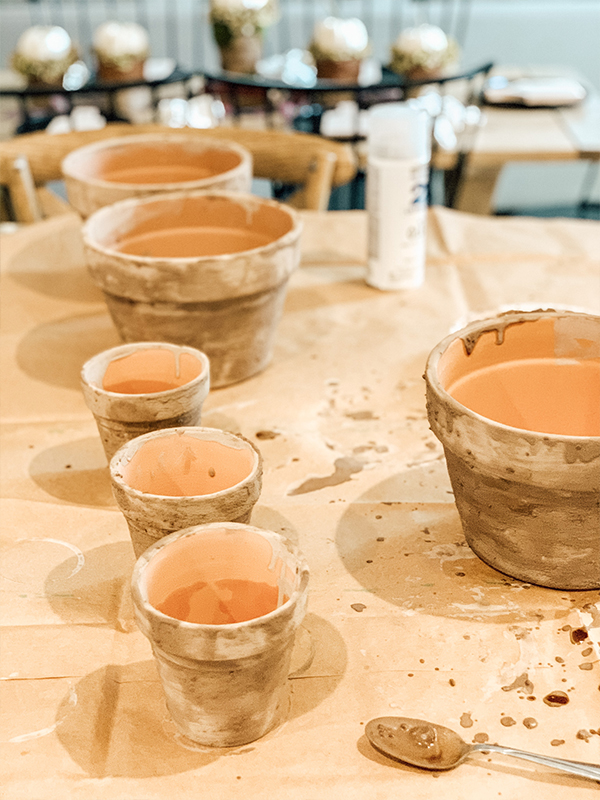
After you finish sanding to your liking, take a clean paintbrush and dust off the pots. Once all of the dust is removed, you are going to spray a matte sealer on the pots. I did 3 coats on mine. Spray in short even sprays to avoid running.
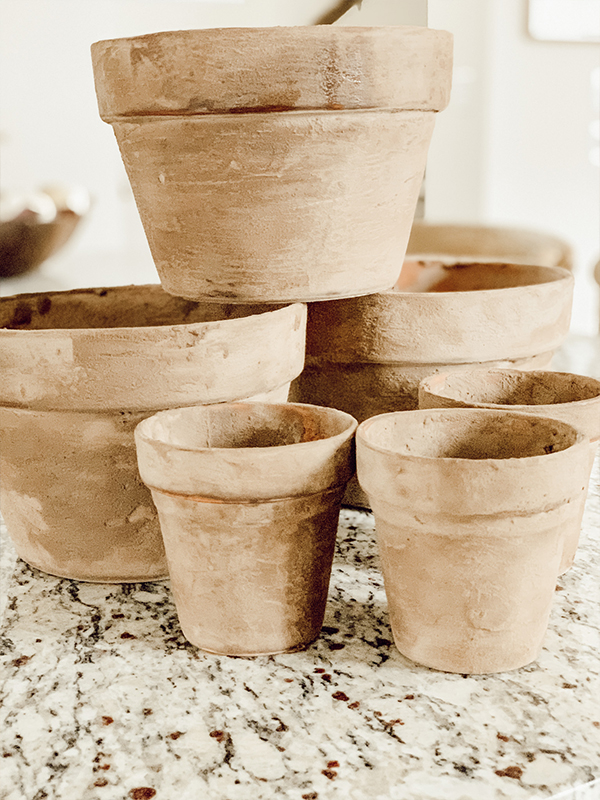
As you can see, I left mine pretty chunky, which I love! I actually have the big pots already on my front porch. I will have to show you when I do my Fall blog hop.
So, what do you think? Are you going to try the DIY aging terra cotta pots? If you do, please let me know what you thought. It is one of the easiest DIY projects I have ever done and it makes such a fun statement. Be sure and check out some of my other DIY projects here.